 Pin It
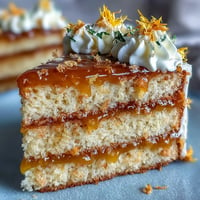
 My sister texted me three weeks before her birthday with a single emoji: a cake. No words, just the cake. I knew exactly what she meant—she wanted something that looked like it came from a fancy patisserie, something small and elegant that she could actually finish without leftovers lingering in her fridge for days. That's when these mini layer cakes clicked into place. They're delicate enough to feel special, sturdy enough to handle, and the edible flowers turn them into something almost too pretty to eat.
I made a batch for my coworker's desk birthday surprise, and watching her eyes land on those delicate flowers perched on the buttercream—that exact moment when she realized someone actually cared enough to make something this detailed—that's when I understood why people love these cakes. They're not just dessert; they're a love language.
Ingredients
- All-purpose flour (1 1/4 cups): This is your foundation—don't skip sifting or whisking it with the baking powder and salt, because lumps hide and ruin the tender crumb you're after.
- Baking powder (1 tsp): Freshness matters here more than most ingredients; old baking powder won't lift the cake properly, so check that expiration date.
- Unsalted butter (1/2 cup for cake, 3/4 cup for frosting): Room temperature is non-negotiable—cold butter won't cream properly, and that's where all the air and lightness comes from.
- Granulated sugar (3/4 cup): This sweetens and aerates simultaneously when beaten with butter, so give it the full three minutes of mixing time.
- Eggs (2 large, room temperature): Cold eggs won't incorporate smoothly and can cause the batter to break; pull them out an hour before you start.
- Pure vanilla extract (1 tsp): The real stuff tastes cleaner and brighter; imitation can taste flat and chemical against the buttercream.
- Lemon zest (1/2 tsp): This tiny amount plays backup singer to the vanilla, adding a whisper of citrus brightness that keeps the cake from feeling one-dimensional.
- Whole milk (1/2 cup, room temperature): Temperature consistency matters because you're alternating wet and dry ingredients; cold milk can shock the batter.
- Powdered sugar (2 cups, sifted): Sift it even if it looks fine—lumps become gritty spots in your otherwise silky buttercream.
- Edible flowers (1 cup, roughly 30 g): Only source from trusted suppliers or your own pesticide-free garden; regular florist flowers are treated with chemicals that aren't meant for eating.
Tired of Takeout? 🥡
Get 10 meals you can make faster than delivery arrives. Seriously.
One email. No spam. Unsubscribe anytime.
Instructions
- Prepare your workspace:
- Set your oven to 350°F and line a 9x13 baking sheet with parchment, then lightly grease it so the thin cake layer releases cleanly. Gather all your ingredients at room temperature—this small ritual prevents midway scrambling.
- Mix the dry ingredients:
- In a medium bowl, whisk flour, baking powder, and salt together, letting the whisk do the aerating work. This combines everything evenly and removes any hidden lumps before they hit the wet ingredients.
- Cream butter and sugar:
- Beat softened butter and sugar for a full three minutes until the mixture is pale, fluffy, and noticeably lighter in color. This is where you're incorporating air, which becomes the cake's crumb structure.
- Incorporate eggs one at a time:
- Add each egg individually and beat well after each one—this keeps the mixture emulsified instead of breaking into an oily mess. If it looks grainy, beat a bit longer until it smooths out.
- Add the flavor base:
- Mix in vanilla extract and lemon zest until evenly distributed. The zest specks will disappear into the batter, but the flavor lingers.
- Alternate wet and dry (the gentle method):
- Add half the flour mixture, fold gently until barely combined, then add the milk, then the remaining flour. Mixing gently at each stage keeps the gluten relaxed and your cake tender instead of tough.
- Spread and bake:
- Pour the batter onto your prepared sheet and spread evenly with an offset spatula. Bake 18-22 minutes until a toothpick inserted in the center comes out clean—a few moist crumbs are okay, but wet batter means it needs more time.
- Cool completely:
- Let the cake rest in the pan for five minutes, then transfer to a cooling rack and wait until it's completely cool before cutting. A warm cake is fragile and crumbly.
- Cut your cake rounds:
- Using a 2.5-3 inch round cutter, press straight down and lift straight up to get clean edges. You'll get 12 rounds from a single sheet, with some scraps left over for cake pops.
- Make the buttercream:
- Beat softened butter until creamy, then gradually add sifted powdered sugar, vanilla, salt, and one tablespoon of milk. Beat until the texture is light and fluffy, adding more milk one teaspoon at a time if it's too thick.
- Tint with color (optional):
- Add food coloring drop by drop, stirring well between additions—colors deepen as you beat, so start light. Pastel shades look most elegant with the delicate flowers.
- Assemble each mini cake:
- On a serving plate, place one cake round, spread a thin layer of buttercream on top, then press the second cake round on gently. Pipe or spread another thin buttercream layer on top, and arrange your edible flowers artfully before they're ready to serve.
- Chill before serving:
- Pop the finished cakes into the refrigerator for 15 minutes so the buttercream sets slightly and the whole structure becomes stable. This makes them easier to handle and keeps the frosting from sliding.
 Pin It
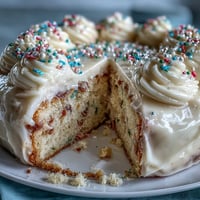
 There's something magical about watching someone realize they can make something this polished in their own kitchen. My friend Sarah looked at these cakes and asked if I'd bought them from a bakery, and when I told her I'd made them that morning, she asked for the recipe immediately. That's the moment I knew these weren't just cakes—they were confidence on a plate.
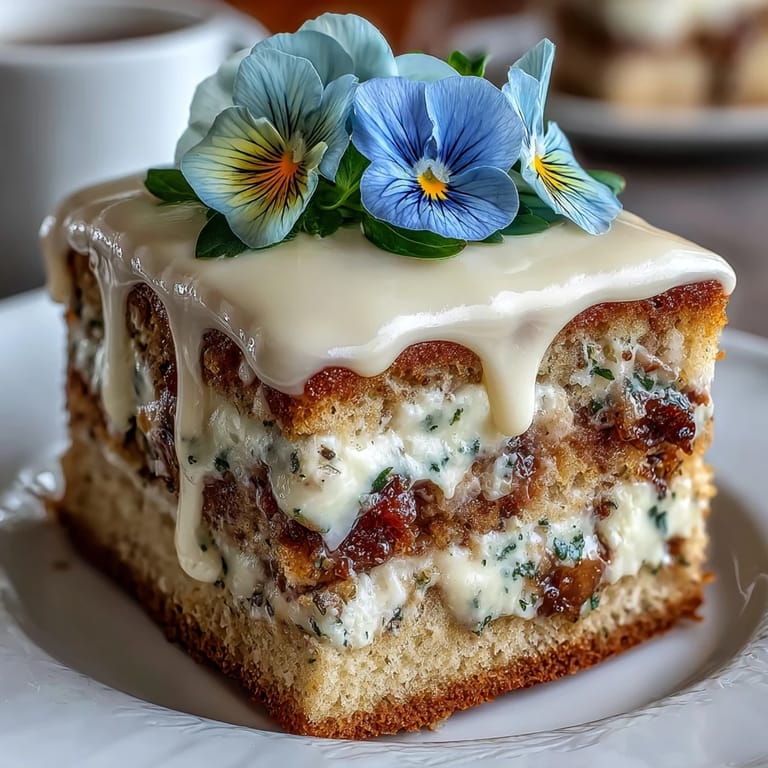
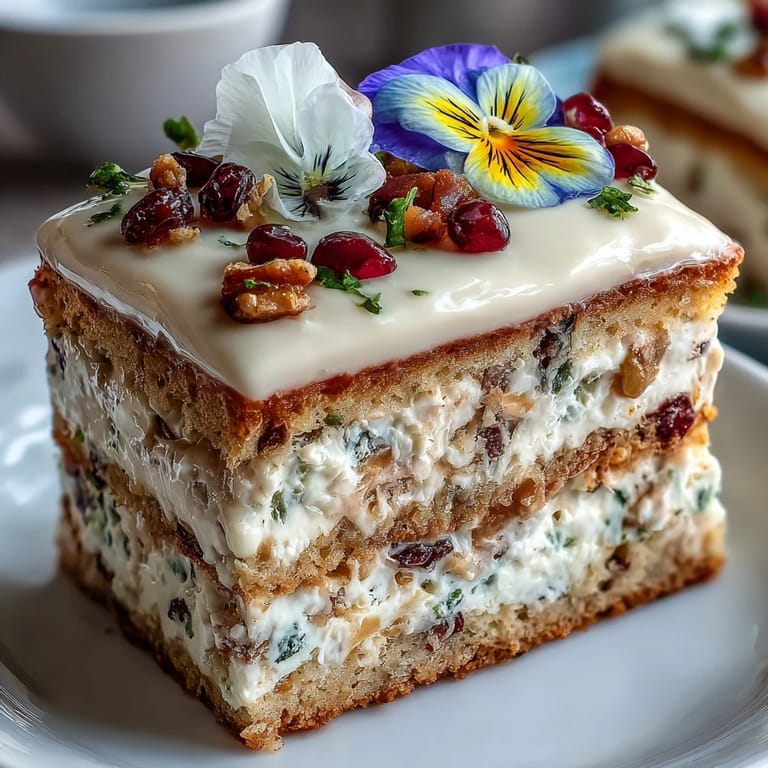
Working with Edible Flowers
Edible flowers are the secret ingredient that turns a pretty cake into a showstopper, but they require respect and caution. I've learned the hard way that not all flowers are edible—some are toxic, and all florist flowers are treated with pesticides. The safest approach is to grow your own pansies, violas, or nasturtiums in a garden you control, or order from specialty suppliers who explicitly sell food-grade flowers. When you receive them, gently rinse and pat dry with paper towels, then arrange them just before serving so they don't wilt or bruise.
Flavor Variations Worth Trying
The vanilla-lemon combination is elegant and classic, but once you understand the basic structure, you can play. I've brushed the cake layers with a simple citrus syrup made from equal parts sugar and lemon juice heated together, which adds moisture and deepens the lemon flavor. I've also tried replacing half the milk with almond milk and adding 1/4 teaspoon of almond extract for a subtle nuttiness that pairs beautifully with the flowers. The buttercream takes color well—soft pastels feel more sophisticated than bright shades, and matching the frosting color to your flower choices creates a cohesive, intentional look.
Making Ahead and Storage
These cakes are actually better when you plan ahead, which rarely happens in baking but feels like a gift when it does. You can bake the cake layer up to two days in advance and keep it wrapped in plastic wrap at room temperature, or bake and assemble the unfrosted mini cakes up to one day ahead and refrigerate. The buttercream keeps for five days in an airtight container, and you can tint it fresh the day you assemble if you're worried about color fading. Just wait to add the edible flowers until a few hours before serving so they stay perky and beautiful.
- Baked cake layers stay fresh for two days wrapped tightly at room temperature.
- Buttercream lasts five days refrigerated, so you can make it the day before assembly.
- Add flowers just before serving to keep them from wilting or bruising.
 Pin It
 Baking these cakes taught me that celebration doesn't have to be complicated—it just has to be intentional. Every time someone's face lights up at the sight of these delicate little cakes with their painted buttercream and perched flowers, I remember why I started baking in the first place.
Recipe Questions & Answers
- → How do I ensure the cakes remain moist?
To keep the mini layers moist, avoid overbaking and consider brushing them lightly with citrus syrup before assembling.
- → Can I use other types of edible flowers?
Yes, just make sure the flowers are food-safe and pesticide-free, sourced from reputable suppliers.
- → What is the best way to tint the buttercream?
Use gel-based pastel food coloring and add gradually to achieve soft, even tones without altering the texture.
- → How large are the mini cakes?
Each cake is about 2.5 to 3 inches in diameter, cut with a round cutter from a sheet cake.
- → Can these cakes be made ahead of time?
Yes, assemble and chill for at least 15 minutes before serving to enhance texture and flavor.
- → Are there any common allergens in this dessert?
These cakes contain wheat, eggs, and dairy. Also, some edible flowers may cause allergic reactions in sensitive individuals.