Pin It
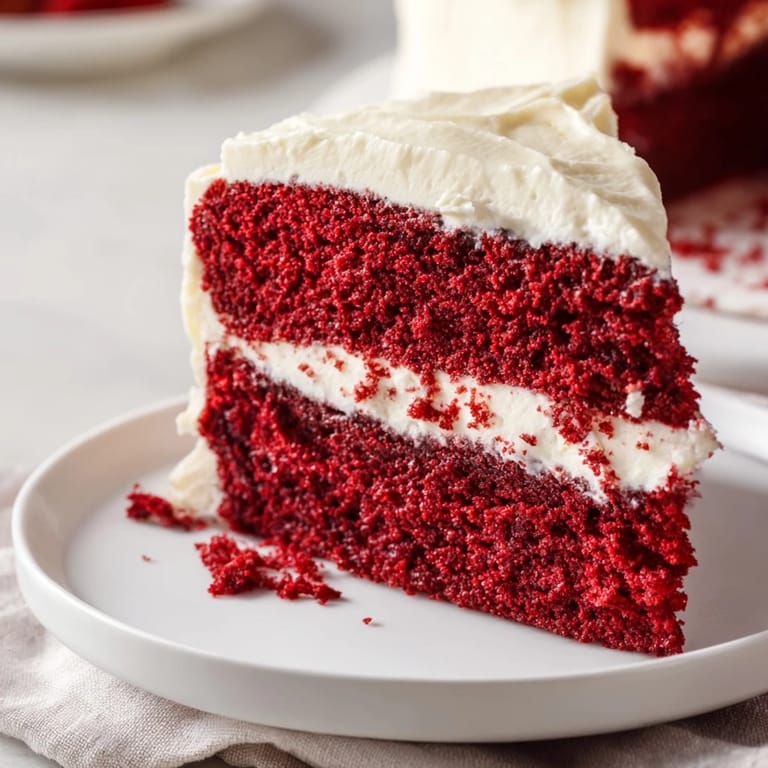
 My grandmother kept a red velvet cake in her china cabinet for exactly three days after Christmas, wrapped in wax paper like it was made of spun glass. I'd sneak glances at it between the cups, watching how the deep crimson layers caught the light filtering through her lace curtains. The first time I made it myself, I stood in my kitchen at midnight, suddenly understanding why she treated it with such reverence—it's not just a cake, it's a small ceremony.
I made this for my sister's birthday dinner, and my brother-in-law—who claims he doesn't like cake—asked for seconds. He scraped the plate with his fork like he was searching for gold, and I knew right then that red velvet isn't just dessert, it's the thing that makes people linger at the table a little longer.
Ingredients
- All-purpose flour (2 ½ cups): The foundation that keeps everything tender—don't skimp on measuring by weight if you have a scale, it changes everything.
- Unsweetened cocoa powder (2 tablespoons): Just enough to whisper chocolate without screaming it, the secret that makes people pause mid-bite.
- Baking soda (1 teaspoon) and salt (½ teaspoon): These two wake up the cocoa and buttermilk, creating that subtle tang you can't quite name.
- Granulated sugar (1 ½ cups): The sweetness that balances the vinegar's sharpness.
- Unsalted butter (1 cup): Room temperature means it creams into clouds with the sugar, capturing air that makes the cake rise gentle and high.
- Large eggs (2): Also room temperature—this matters more than you'd think, they blend smoother and the cake stays moister.
- Buttermilk (1 cup): The tang is the entire point; don't substitute without losing something essential.
- Vanilla extract (2 teaspoons): Adds warmth that lingers on the back of your tongue.
- White vinegar (1 teaspoon): Reacts with the baking soda to activate the color and add complexity—this isn't just flavor, it's chemistry.
- Red food coloring (1 ounce): Gel coloring gives you deeper, richer reds that liquid coloring sometimes can't achieve; it won't water down your batter.
- Vegetable oil (½ cup): Keeps the cake moist for days in a way butter alone cannot.
- Cream cheese (8 ounces): The frosting's backbone, slightly tangy and dense, it needs to be softened so it blends without lumps.
- Butter for frosting (½ cup): Softened like the cream cheese, it adds richness and makes the frosting spreadable.
- Powdered sugar (4 cups): Sifted first so it mixes silky smooth without little granular surprises.
Tired of Takeout? 🥡
Get 10 meals you can make faster than delivery arrives. Seriously.
One email. No spam. Unsubscribe anytime.
Instructions
- Prepare your stage:
- Heat the oven to 350°F and take a moment to grease and flour those two 9-inch pans—getting this right means your cake doesn't stick and tear when you turn it out. If you have parchment paper, line the bottoms too; it's the small insurance policy that saves disappointment.
- Build the dry foundation:
- Sift the flour, cocoa, baking soda, and salt together into a bowl, and really let the sifter do its work—it breaks up any hidden lumps and gives the flour air. Set this aside and leave it alone.
- Cream the butter and sugar:
- Beat them together until they look pale and fluffy, almost like mousse, which takes about 3 minutes with an electric mixer. This is where you're capturing tiny pockets of air that will help your cake rise.
- Incorporate the eggs:
- Add them one at a time, beating well after each egg disappears into the mixture. This slow integration keeps everything emulsified and smooth.
- Build the wet mixture:
- Stir in the oil, vanilla, and vinegar until they disappear into the creamed butter. Mix gently and don't worry if it looks slightly separated—it will come together.
- Color the buttermilk:
- In a separate small bowl, mix the buttermilk with red food coloring, stirring until the color is even. This prevents red streaks from appearing in your batter.
- Combine wet and dry:
- This is where precision matters; add the dry ingredients in three additions, alternating with the buttermilk mixture and starting and ending with dry ingredients. After each addition, mix only until the streaks of flour disappear—overmixing toughens the cake and robs it of tenderness.
- Fill the pans:
- Divide the batter evenly between the two pans, smoothing the tops gently. You can use a kitchen scale to weigh equal amounts if you want layers of matching height.
- Bake with patience:
- Slide them into the oven for 28 to 30 minutes; you'll know they're done when a toothpick inserted in the center comes out clean or with just a crumb or two clinging to it. The cake should still jiggle very slightly in the center when you gently shake the pan.
- Cool carefully:
- Let the cakes rest in their pans for 10 minutes—this sets the structure just enough—then turn them out onto wire racks. They need to cool completely before frosting, or the frosting will melt into puddles.
- Prepare the frosting:
- Beat the softened cream cheese and butter together until there are no lumps and the mixture is light and creamy. Add the sifted powdered sugar gradually while beating, then the vanilla and a tiny pinch of salt, beating until it's light and fluffy enough to hold soft peaks.
- Assemble the cake:
- Once the layers are completely cool, place one on a cake plate or stand, spread frosting between the layers, then frost the top and sides. The frosting should be thick enough to hold shape but soft enough to spread easily.
 Pin It
 I once forgot to let the cake cool completely before frosting it, and watched the frosting slide down the sides like a slow avalanche. My friend laughed and said it looked like modern art, and we ate it straight from the plate with forks, and it was still perfect. Sometimes the best moments happen when things don't go exactly to plan.
The Chemistry of Red Velvet
Red velvet isn't chocolate cake with food coloring—that's a common mistake that changes everything about how it tastes. The cocoa is there but subtle, just a whisper, and the real magic happens when the vinegar meets the baking soda, creating a reaction that activates the color and gives the cake its distinctive slight tang. It's less about flavor and more about creating something that feels different on your tongue, something that tastes like tradition and celebration.
Frosting Mastery
The frosting is where patience becomes visible. Cream cheese needs to be soft enough to beat smooth but cold enough to stay thick, and butter does the same dance. The sifting of powdered sugar seems fussy, but it's what prevents little gritty granules from appearing in your frosting and ruining the texture—you want it to spread like clouds, not sand. Some people add a tiny splash of vanilla or lemon juice to cut the richness, but I've never needed to.
Storage and Serving
Red velvet cake gets better as it sits, the flavors mellowing and blending together in a way that makes the second day taste richer than the first. It keeps covered in the refrigerator for up to five days, and you can even freeze the layers unfrosted for up to three months if you're planning ahead. Bring it to room temperature before serving if you've chilled it, so the frosting isn't hard and the cake isn't dense.
- Slice with a hot, wet knife wiped clean between cuts—this gives you neat edges instead of crumbs everywhere.
- Pair it with coffee, sparkling wine, or even iced tea for something unexpected.
- Leftover frosting keeps refrigerated for a week and can be stirred smooth and spread on brownies or swirled into vanilla ice cream.
 Pin It
 Red velvet cake is the kind of dessert that makes people feel cared for, even when you're just following a recipe. It's elegant without being pretentious, familiar but still somehow special.
Recipe Questions & Answers
- → What gives the cake its red color?
Red food coloring is used to achieve the vibrant red hue typical of this classic dessert. Gel food coloring can intensify the color.
- → How does buttermilk affect the cake?
Buttermilk adds moisture and a subtle tang, helping create a tender crumb and enhancing the overall flavor balance.
- → Can I substitute the cream cheese frosting?
While the cream cheese frosting complements the cake's flavors perfectly, alternatives like whipped buttercream can be used depending on preference.
- → What is the best way to ensure moist cake layers?
Avoid overmixing the batter and bake until a toothpick comes out clean. Using buttermilk and oil contributes to moistness.
- → How should the cake be stored?
Cover and refrigerate the cake to keep the frosting fresh and maintain the cake's texture for up to five days.